Sunday, June 30, 2013

Summer Breakfast Sandwiches

I LOVE, LOVE, LOVE summer!  Reason #213... Breakfast sandwiches on the grill!  Yes, on the grill!  Living in Ohio, we can only makes these on the grill in the warmer months (we have tried to make them indoors and they just are not the same :( ...) maybe that makes them a bit more special to eat and enjoy in the summer.  This is definitely a timing recipe with adding and flipping ingredients on the grill.  You can make your breakfast sandwiches any way you like.  Biscuits with sausage and/or  bacon, eggs and cheese is our favorite combo. 

We were ecstatic on our last trip to the grocery to find Pillsbury is making the Grand's Corn Biscuit again! (Mr. Allpinkroses found them and showed me, I believe I did an actual jig in the grocery- I'm sure the older couple in the same isle suspected I was nuts!!).  They are labeled as "new", however, they are actually a come back.  SO excited!!!  If you have never had the corn version, they are great in this recipe. They add a sweetness to the sandwiches we couldn't replicate without the corn biscuit. Did I say I was excited?  

Items you will need:

A grill
Muffin tin 
Cooking spray
Spatula
A knife (if you are forming your own sausage patties)
Kitchen shears (if you are using bacon)


Ingredients:

Canned biscuits
Meat (sausage, bacon, Canadian bacon, etc.)
Eggs 
Cheese slices (American works well)
Salt 
Black pepper


Here we go!  😁

Prepare your sausage patties, if you are using sausage.  I buy bulk sausage and shape my own patties.   We prefer Jimmy Dean's regular sausage and it's cheaper than prepared patties. 


If you are using bacon, you can cut the package in half. I find it easier to handle the bacon slices if they are cut in half.  


I use my kitchen shears to cut the package in half, vertically. The other half will fit nicely in a plastic bag if you are not using the whole package. 

Using cooking spray to spray each well of your muffin tin. (Stick, pardon the pun, with me here...).  You know those fast food breakfast sandwiches?  This is how your eggs will turn out. Add one cracked egg to each well in your muffin tin. Season your eggs. 


Side note here... See the vegetable oil in the back ground?  Didn't work too well in place of the cooking spray. Middle Pinkrose is still soaking the pan to get the egg off the pan. 

So, we should be ready to head out to the grill. 


Place your choice of meat on the grill. (I haven't tried Canadian bacon, I would imagine you would be basically heating that through.)  We have an additional half-rack on our grill, in this case, the meat goes on the main grid. 


Half way through cooking the sausage and/or bacon (approximately 8-10 minutes, or until the meat begins to brown), you will add your biscuits and eggs to the half rack and flip the meat. 

Cook everything for another 3-4 minutes (or when your biscuits begin to brown), flip your biscuits (and check your eggs and meat).  

Continue to cook everything for approximately 3-4 minutes or until your eggs and biscuits are ready. 

Remove everything from the grill. 

Assemble yout sandwich as you like and ENJOY!!! 


I'm ready for breakfast again! 😁


Saturday, June 15, 2013

Nacho average nachos!!!

I need to share this AWESOME dish with you, pulled pork nachos.  You can serve this as an appetizer or my family enjoys it as a quick 'n easy meal and I mean QUICK and EASY.  I enjoy it because porkloin is often on sale making this a CHEAP, quick and easy (two) meals.  :D

So let me back up to last night's dinner... We can prepare about a three pound (give or take a few ounces) pork loin in the oven (delish, however, boring..zzzzz..) and have left overs, even more boring...zzzz...zzzz. Well... until I had the ah-ha moment to shred the pork and make my own version of pulled pork nachos!!! I assure you, Mr. Allpinkroses was as skeptical as you are right now... But,trust me here.   

You will need: 

baking sheet, lined with foil
stand mixer (optional)

Ingredients:

pork leftovers
barbecue sauce, I highly recommend Sweet Baby Ray's
corn chips, we use Tostitos Scoops
3 c. Colby jack shredded cheese
black beans (optional)
black olives (optional) 
salsa or picante
sour cream

Here we go!!!

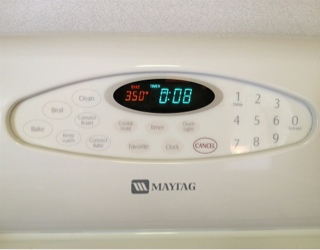
Preheat your oven to 350*. 

Note; I leave my leftover pork loin in the pot I prepare it in the previous evening.  

I put my pork loin back on the stove top over medium heat just long enough to take the chill off of the meat.  This makes the shredding easier and go quicker. Go ahead and shred the pork loin in whatever fashion you normally prepare your shredded meat.  I read a post over at  One Good Thing By Jillee showing you how you can shred meat in a stand mixer. It REALLY works!!! (See below.)


Add barbecue sauce to taste. 

Prepare your work space to assemble your Pulled Pork Nachos.  Line your baking sheet with aluminum foil.  Spread a layer of nacho chips evenly over the baking sheet (for a meal for five, we use an entire bag of chips)


and sprinkle a layer of shredded cheese, about a cup, evenly over the chips.  If you are adding the optional black beans or olives, add them here.  Your next layer will be your shredded pork, scoop evenly over the chips. Add the remaining 2 cups of shredded cheese. 


Place your nachos in the oven and bake for about 8 minutes.  


You are aiming to heat the meat through and melt the cheese. 


Serve the nachos with salsa or picante and sour cream. 


And that is the beautiful pulled pork nachos! 

Enjoy!!! :D


Monday, June 10, 2013

What's more Italian than Lasagna?


Lasagna is one of our "special dinner" favorites.  Throw a store bought garlic bread and a small salad with lasagna and you have a relatively inexpensive family meal which is very simple to make.  This lasagna requires more patience while it is in the oven than anything.  I do use store bought sauce and will continue to do so until Campbell's Soup shares their Prego recipe with me (in a family-size recipe).  Plus, my Father-in-law has worked at Campbell's Soup for 45 years as well as a couple Uncles, an Aunt and a few of my husband's relatives.  It's my little contribution to their job security.

You will need:

Pan for browning hamburger
Pot to boil lasagna noodles
9 x13 or 10 x 15 baking pan, I prefer a glass 10 x15 
Oil
cooking spray
2 lg mixing bowls

Ingredients you will need:

seasoned salt
2 lbs ground beef
1 45 oz jar Prego fresh mushroom spaghetti sauce
1 lg container cottage cheese
1/2 c parmasean cheese
16 oz (4 c.) shredded Colby jack or          Monterey jack cheese. 
3 eggs
Pepper
9 lasagna noodles

Here we go!!!

Season the ground beef with seasoned salt (I prefer Lowry's Seasoned Salt), brown and drain.  I LOVE to use my Pampered Chef Mix 'n Chop (see picture below) for browning ground beef.  If you don't own one of these babies, you seriously need one!!!  You can order one from my friend, Dawn.  


Boil lagagna noodles and drain.  Adding a little oil to your water will keep the noodles from sticking together. 


In one large mixing bowl, combine your meat and spaghetti sauce. In another large mixing bowl, combine cottage cheese, eggs, parmasean cheese, 1 c. shredded cheese and pepper, to taste.  

Spray your baking dish. Assemble your work station with the baking dish and mixing bowls, noodles, parmasean cheese and shredded cheese. 

Let the layering begin! 

Your first layer will be a light layer of spaghetti sauce. 


Add a layer of noodles. 


Add a a layer (1/3 of the cheese mixture). 


Add a layer of the meat mixture (about 1/3 of mixture). 


Sprinkle with parmasean cheese and repeat process twice more. 

Final layer is remaining shredded cheese and sprinkle with parmasean cheese. 


Bake @ 375* for 50-60 minutes.  


Add a nice side salad and bread and ENJOY!!!!!


Sunday, June 2, 2013

MY Seven Layer Bars

What is your signature dish (or dessert) everyone knows, loves and wants HAS to have?

My family expects me to bring Seven Layer Bars a.k.a. Magic Cookie Bars to our family functions.  I called my Step-mom, while on the way to Easter dinner, to tease her by saying I thought I was supposed to bring beans.  Beans?!? Hee-hee!  (She forgave me when I showed up with my Seven Layer Bars in hand.)

I could make these babies with my eyes closed and my hands tied behind my back, ok...not really, but they are INCREDIBLY simple to make. The ingredients compliment each other perfectly! The buttery graham cracker crust and CHOCOLATE (insert angelic choir), richness of the butterscotch and coconut (you can almost taste them, can't you? ) and the healthy walnuts (What?!? Healthy?  I hope the nutritional info doesn't ruin it for you, lol!).  

So, I have this thing... I believe it's called a "bad habit"?   I feel the need to tweak recipes. The link above is the original version of Seven Layer bars, following is MY version of "Seven Layer Bars".....

Ingredients:

2 sleeves of graham crackers
1stick butter
1 c coconut
1 c walnuts
1 c chocolate chips 
1 heaping c butterscotch chips
1 can sweetened condensed milk (I prefer Eagle Brand)

Here we go!!!

I zip my graham crackers in my mini-chopper or you can crush them by putting them in a plastic bag and work out some frustration with a rolling pin?.  Melt the margarine and mix well with the graham cracker crumbs. 


Transfer the cracker crumbs, spread and press in the bottom of a 9x13, I prefer a glass pan.  


I use a heavy glass with a flat, smooth bottom to tamp the crumbs evenly into the bottom of the pan (because that's the way Mom taught me).

Add your layer of nuts. 


Next, I sprinkle the layer of coconut. Adding your nuts and coconut before the baking chips and sweetened condensed milk will keep the coconut from falling off the bar (and they look much prettier this way, too). 


I add a cup of semi sweet chocolate chips...


followed by a heaping cup butterscotch chips (I know, the recipe only calls for a cup.).


Slowly, drizzle a can of sweetened condensed milk over the bars. Stay about an inch from the edges to avoid hard, burnt edges (yuck!). 


Bake @ 350* for about 25-30 minutes, or until the sweetened condensed milk is bubbly. 

Allow bars to cool (my family enjoys the bars if they are just a little warm). Serve with milk and ENJOY!!! ;)


Sunday, May 26, 2013

Nan's Amazing Cinnamon Rolls

I was still finishing my (2nd) Saturday morning coffee when I received a surprise phone call. It was my cousin, B.R., from Vegas. He says, "Hey, I'm on my way to Nan's to learn to make her cinnamon rolls. You want to meet me there?".  B.R. is notorious for surprise visits.  Since I had been trying to do this with her for years but had let life's business continue to get in the way,  I accepted the invite. I was ecstatic!

As we walked up the back steps, the aroma of the yeast greeted us.  I LOVE that smell!  The dough was in the oven, rising.

We visited; catching up on current times and reminiscing about old times, told my daughters stories about when we were younger and looked at old pictures.  We rifled through Nan's cookbooks, remembering our favorites as a child and excited about making them ourselves now.  

We used a Foundation Sweet Dough. 

2 pkg yeast
1 c. warm water
1 T. sugar 
1 c. milk
6 T. shortening
1/2 c. sugar
1 t. salt
7 c. flour
3 eggs
Sugar and cinnamon 

There are so many variations of rolls to make with this dough. 


Here we go!!!!!

Dissolve yeast in warm water with 1 T sugar. Heat milk. Add shortening, 1/2 c. sugar, salt- cool to lukewarm. Add 2 c. flour. Add yeast and eggs. Beat this mixture well. Add remaining flour. Knead, gently for 6-8 minutes.  Allow dough to rise (double in size) in a warm place.  

Cut dough in half and turn out on a floured workspace. 


Roll dough out to about 1/2 " thickness in an oblong shape.  Spread with a layer of softened margarine. 

Sprinkle with sugar (covering dough) and cinnamon, to taste. 


Pull and roll dough into a long cylinder shape. Pulling as you roll keeps the rolls from falling apart. 


Cut into 1" rolls and place in a grease pan.


Return dough to a warm place and allow rolls to rise, double in size. 


Bake in a preheated 375* oven for 20 minutes or until golden. 


Cool and frost with your favorite icing. We made my Grandmother's frosting. I'll have to work on the measurements, it's a "this much" powdered sugar, a "hunk" of softened margerine and 2 spoonsful of fresh, hot coffee kind of recipe. 


Enjoy!!!


Monday, April 29, 2013

Hulless Carmel Corn

Hulless Carmel is on my honored "Favorite Recipes" board on Pinterest. It is a twist off of my Nan's recipe. I can remember her making carmel corn my entire childhood. I vividly recall someone would get the "carmel corn bowl" out, someone would pop the popcorn in the Whirley-Pop popcorn popper (Can you smell it? There really is no other way to pop great popcorn!) and someone would begin making the carmel. The family fun would begin the moment the baking soda was sprinkled into the boiling hot carmel and the carmel would come screaming to the top of the sauce pan. It was all giggles getting the carmel to the carmel corn bowl and pouring it over the fresh popcorn. The adults, my big brother or older cousins would stir the carmel and popcorn to coat each piece of popcorn. As the carmel began to cool, this became a chore (a chore indeed worth every single ounce of effort). With my family, however, chores somehow became entertaining- still productive, yet always entertaining. My Dad still prefers a large bowl and stirring method. Since I do not have an "official carmel corn bowl", and I'm all about less dirty dishes, I use a (clean) brown paper bag to coat my popcorn. Yes... A brown paper bag. I keep a special stash for making carmel corn.

You will need:
3 qt sauce pan
Measuring cups and spoon
A lg spoon (plastic or wooden)
A brown paper bag
Lg pan
Storage container


Ingredients:
2-7.5 oz bags of hulless popcorn
2 sticks (1 c.) Butter or margarine
2 c. brown sugar
1/2 c. Karo syrup*
1 t. vanilla*
1/2 t. baking soda*

* not present on the day the photo was taken

Place the two bags of hulless popcorn into your brown paper bag and set aside (I find it easier to place mine on the kitchen floor so I can see where I am pouring the carmel.)

Preheat oven to 200*.

Over medium heat, melt 2 sticks (1 c.) butter or margarine, 2 c. brown sugar, 1/2 c. karo syrup, I omit salt from my recipe because hulless popcorn is lightly salted.


Bring the ingredients to a low boil. Stir this boiling mixture for about 5 minutes.

Remove pan from the heat. Add 1 t. vanilla and 1/2 t. baking soda, use caution and be prepared for the carmel to rise quickly.


Pour carmel over the hulless popcorn.


Roll the brown paper bag down a few times and begin shaking and rotate the bag so the carmel will completely cover all of the hulless popcorn.

Optional;  Pour the carmel corn onto a large baking pan, I do this in two batches to avoid losing carmel corn all over the kitchen. Place the pan of carmel corn in the oven, turning every 10-15 minutes for about 30-45 minutes.

Cool and store in an airtight container.

ENJOY!!! :)

Thursday, April 25, 2013

Oreo Truffles? Yes, please!

Ok... These little guys??? Incredible! You MUST try this recipe. Just three surprising ingredients! You will be delighted how quick and easy you can crank out a batch! The variations are as endless as your imagination.


I would have NEVER guessed Oreo cookies, cream cheese and chocolate (baking chips or your fav dipping chocolate) could work this well together never mind how decadent! I can't stop thinking of different flavor combinations; chocolate cookies dipped in white chocolate? peanut butter and chocolate? raspberry? I'll have to experiment there- but with dark chocolate for certain!

Here we go! So exciting!!! 😁

Oreo Truffles
1-16 oz pkg Oreos
1-8 oz cream cheese
16 oz Semi sweet baking chips (or dipping chocolate)

Drop the whole package of (choice flavor) Oreos into the bowl on your mixer. Turn the mixer on the lowest setting to avoid missile Oreos attacking! Manual option, transfer cookies to a plastic baggie and wacka-mole! Let off some steam! We are aiming for crumbled cookies.


Mix the creme and wafers together until all the cream disappears.


Fully incorporate the cream cheese with the cookie crumbs.


Shape into 1" balls.


Dip in melted chocolate.


Chill for about an hour and ENJOY! 😃

What flavors will you try???